

By Rachael Simon, with contributions from Kimberley Jurens
Whenever anyone asks about fixing their flute themselves, their question is typically met with at least these two different types of replies:
- “Don’t touch it! You’ll ruin your flute forever!”
- “It’s easy, anyone can do it. Taking it to a professional is overrated.”
Both of these sentiments are well meaning. I equally agree and disagree with both. Here’s my response:
“Since flutes are delicate instruments with many interrelated parts and sensitive adjustments, knowledge of the mechanism and materials is required in order to safely make any changes without damage. This is where a professional is the most ideal option. However, in instances where repair service is not available, or very poor, it is possible to acquire some basic knowledge and skill to correct some of the most urgent issues, keeping in mind that many repairs are going to be impossible to complete without the resources of a full service shop and many hours of training.”
Can I fix my own flute? This was a question that I first asked myself 17 years ago, as a college flute performance major. In the present day, as a professional flute repair technician, I can confidently say that I answered my question with a “yes”.
But could I fix my flute 17 years ago the way that I can today? Absolutely not. Like any other skilled profession, it takes many years and thousands of hours to gain proficiency. Therefore, if your primary focus is on playing the flute, rather than fixing it, there must be the understanding that there will be some limitations in what is achievable without the required experience and knowledge.
I won’t say that someone can’t fix their flute any more than I would say someone can’t become a doctor. I will say that it takes about as many hours of practice to do at a high level, however. Imagine the amount of skill and knowledge that it takes to clean and dress a wound vs. perform a major surgery.
This is the way that DIY flute repairs should be approached. If you don’t have a professional tech background, don’t attempt open heart surgery. But cleaning and bandaging an injury? Sure! You can learn to do that. Think of it as “flute first aid”.
Not every problem can be resolved with basic first aid skills, but many problems can be mitigated this way, or at least slightly improved. With the right techniques and tools, it is possible to administer flute first aid without any harm.
Do’s and don’ts when repairing a flute yourself
What does everyone need to administer first aid? A first aid kit! I’m going to give you a list of supplies, and how to use them. But first, here are some do’s and don’ts of DIY flute repair:
DO:
- Practice first on a flute that you are not counting on to be playable. It is highly possible that your first few repair attempts will not result in a playable instrument. There are typically student flutes galore for cheap on Ebay or similar sites, as well as Facebook marketplace. It doesn’t need to be in playable condition, it’s just for practice so that you don’t accidentally hurt your primary flute.
- Read! You will not be able to learn everything that you need to know about any trade by reading alone, but if you do not have an experienced person guiding you, a good instructional book is the next best thing. I highly recommend Servicing the Flute, by JL Smith, and The Complete Guide to the Flute and Piccolo by James Phelan. In fact, Mr. Phelan’s book is how my career got started. Mr. Smith’s book is also excellent, a compact manual with excellent graphics and instructions for basic repairs.
- Have patience. There’s a reason that there is a shortage of professionals doing this work- it can be very challenging and frustrating, especially if you don’t have access to direct instruction.
- Be careful. A quote that many repair techs learn at the beginning of their career is from Verne Q. Powell, “If you think you’re going to make a mistake, stop, and don’t do it.” I thought that statement was a little odd the first time I read it, but over time, it will make more and more sense. You will start to recognize that “uh-oh” feeling before you do something. Listen to that feeling, take a step back, and re-think your approach.
- Have the right tools for the repair you are attempting. You are only as good as your tools.
- Pursue other hand crafts. The more familiar you are with using tools and working with your hands, the more naturally this will come to you. If you’ve never held a hand tool in your life, it isn’t impossible, but just be extra patient with yourself and expect a steeper learning curve.
- Respect your limitations. Remember the doctor analogy- if you don’t have years of training and experience, don’t expect to have the results or skills of someone with years of training and experience. It doesn’t happen overnight, just as with any other skill.
- Reach out to your regular repair tech, if you have one, and they should be able to advise on whether this is something you can do yourself or whether it should be brought in. Most of us don’t want you to make an unnecessary trip to the shop!
- Be honest with your repair tech if you did any DIY work. It will help us know best how to help you and your flute.
DON’T:
- Practice on your primary instrument. I know the goal is to eventually be able to perform emergency or minor repairs on your primary flute, but mistakes are a strong possibility for a beginner at any skill, and it’s best to make your mistakes on a practice flute first. Have an old marching band flute in the closet that you’re not using? Perfect!
- Use uncovered metal pliers on your flute. They can cause major and irreparable damage very quickly. The pliers used for flute repair are specialized tools and require training in order to be used safely.
- Rush. See VQP quote above! Rushing repairs is a race that nobody wins, even if it feels necessary in the moment.
Flute First Aid Kit
Now that you’ve carefully read all of the Do’s and Don’ts, here is your Flute First Aid Kit:

- The Complete Guide to the Flute and Piccolo by J.James Phelan
- Servicing the Flute, by JL Smith
These are the most important items on your list. Read these books cover to cover, and then refer to them continuously as you do your practice repairs. You will need to first become familiar with how the flute works in order to diagnose what is wrong and what approach to take to fix it, even if just temporarily. A correct diagnosis is absolutely crucial for success.
These books will also go much more in depth than this article if you wish to learn more about how flutes work and more permanent repair techniques.
● Pencil case
The pencil case is a way to store your first aid supplies. This kit is designed to be compact and travel size.
● Popsicle stick
The purpose of the popsicle stick is to function as a tidy storage device for pre-cut pieces of tape, as well as post-it note pieces. The idea is that instead of carrying around a number of rolls of tape etc,you can wrap the tape around the popsicle stick and adhere the post-its pieces to the stick to make the kit smaller and easier to use in an emergency. It will also be easier to perform an emergency repair at rehearsal when you aren’t trying to cut tiny pieces of things in the moment.
I typically have on my popsicle stick about 6” of tape, as well as a number of pre-cut little 2mm-3mm wide strips. Likewise, the plumbers’ tape is just wrapped around a popsicle stick to take up less space.
● Painter’s tape / masking tape
These can be used in an emergency to temporarily take the place of key corks or regulation materials that have fallen off. Pre-cutting them into small strips makes it a bit easier to handle when you actually need them. I tend to cut the tape into 4mm x 8mm pieces, and have them in 1, 2 and 3 layer “precuts” stuck to the popsicle stick.
Likewise, with the sticky notes, I tend to cut them into 4mm-5mm x 8mm-10mm strips that are from the sticky part of the note. For players with open hole flutes – if you cut your finger and don’t have plugs, an easy and temporary fix is to cut out a circle that is slightly smaller than the size of the key that you need to cover, and put that over the key to cover the hole.
● TeflonTM tape / Plumber’s tape (PTFE)
Plumber’s tape is great as a temporary fix for a loose footjoint or headjoint tenon. You can also use it to wrap around a loose and leaking headjoint cork.
● Post-it style sticky notes
Sticky notes are a popular material for emergency fixes, as they have the handy adhesive strip, and are easy to cut and work with. Something to keep in mind is that sticky notes are typically about .004” thick, which is very thick in the world of flute adjustments. Therefore, for finer regulations, they may be too thick. If you’ve got a big regulation issue, however, building up sticky notes can do the trick as a temporary fix.
● Small scissors
You will want to be able to cut and trim your materials to size if needed.
● Small screwdriver
The screwdriver is primarily to tighten loose rods and screws, the ones that are found inside the end posts of each key section. If you see a little screw directly on top of or underneath a key, that’s something different- an adjustment screw, which is not intended to be fully tightened down. Do not touch the adjustment screws without reading up on how they work and which key relationships they affect. That information is all in the books that I recommended above.
● Dental floss
This is included in case you’re in a situation where you lose a piccolo tenon cork, or have a piece of your flute come loose somehow, and need to secure it. It can also be used as a loop to re-hook springs that have become unhooked from their catch.
● Cigarette paper / hair curling paper / Yamaha Cleaning Papers
These are used to blot sticky pads, or water-logged pads (mainly an issue on piccolo). If using cigarette papers, make sure not to get the adhesive section near the pad. For schools/practice spaces, etc. with 100% no-drug policies, consider using the Yamaha Cleaning Papers, or getting “curling papers” (used for hair rollers) from a hair/beauty supplier instead.
Be sure to avoid anything calling itself “powder paper”! The powder will eventually gunk up with exposure to moisture, causing the pad to stick and also possibly ruining the pad skin.
● Covered hair band (must be fully covered – not metal, no rubber)
If you have a key that is binding, or a trill key spring has broken so the key isn’t able to stay closed and need to use an elastic as an emergency fix, a 100% covered hair tie with no metal parts is ok for this purpose. Never use plain rubber bands, the sulfur content in the rubber band will tarnish the flute badly and quickly.
● Individually wrapped isopropyl alcohol wipes
Alcohol wipes can help with tight tenons by cleaning the joints. Allow the alcohol to evaporate completely before reassembling the flute, and if you have a microfiber cleaning cloth it is often helpful to wipe the tenons off with this as well. These wipes are also used to clean the lip plate of the flute – especially if you ever need to have someone else play your instrument.
Practice
Now that you’ve got your first aid kit together, acquire a practice instrument and start practicing! That way, you’ll be familiar with all of your materials and their uses before an emergency on your primary instrument comes to pass.
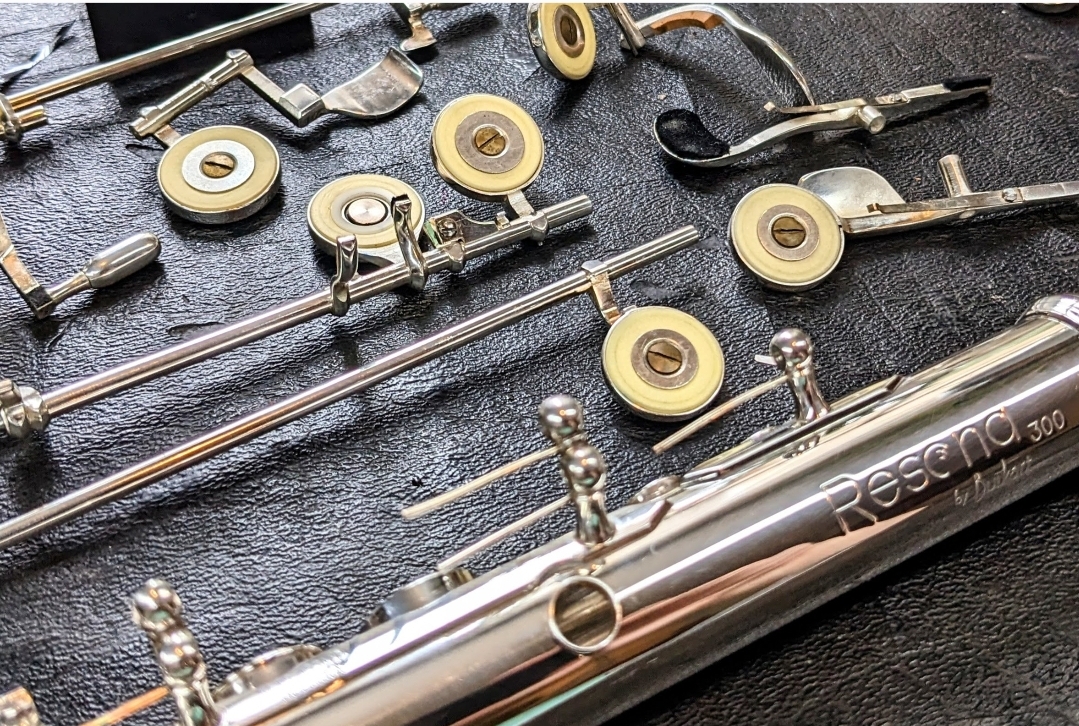
Below are some pictures and descriptions of me doing all of these emergency fixes on an old student flute of mine.
IMPORTANT NOTE: All of these fixes are intended to be temporary until a more thorough repair can be performed.

Righty-tighty, lefty-loosey! If you have a screw that keeps coming loose, tighten it to the right with your screwdriver. Use one hand to turn the screwdriver, and the other to lightly hold the blade of the screwdriver.
This hold still allows the screwdriver to turn, but helps protect the body and keys from a screwdriver slip. Remember, the only screws that you want to tighten are the ones inside the posts, not on the keys themselves.
If after tightening the screw, one of the keys stops moving freely and stays stuck down, gradually loosen the screw in small amounts until the key pops back up and moves up and down again.


Here is one way to use the masking tape. If a key kicker cork/felt falls off, you can build up layers of masking tape to make a bumper until the key is opening to a height that is similar to the heights of the keys immediately around it.


Here is an example of a common adjustment that can be helped with the addition of a sticky note. This is the F-Bb regulation, sometimes called the “one and one” and the “first finger Bb”. In order for this Bb fingering to work, the Bb key (circled), must close when you press the RH1 or F key. This adjustment is important for third octave F as well. This adjustment is controlled by a linkage on the other side of the mechanism.
In the flute repair and flute making world, this is often referred to as the “back connector”. If the Bb key has a significant gap between the pad and the tone hole when the F key is down (visible to the naked eye would be significant), some material can be added to correct the adjustment.
Once you do your recommended reading, you will learn where these adjustment points are on your flute. Keep in mind that they may be slightly different in appearance between different flutes, but the key relationship is the same.

Simply wrap the plumber’s tape around the loose joint in whatever thickness you need to secure the joint.


Springs should be hooked in place behind little spring “catches” on their respective keys. If you see a spring hanging out in the open, not touching anything at its end, it is unhooked. You can loop the dental floss around the spring and pull it back gently to go back behind its catch.
Pull gently! If you pull too hard, you can cause the spring to lose tension. There are special hook tools to use on flute springs, and small crochet hooks can work for this as well, but it is very easy to scratch and damage the flute with these tools. It’s impossible to do any permanent damage to a flute with dental floss!

If you have a trill key that is not staying closed anymore, and you’ve verified that the trill springs are in place, there may be a mechanical issue that would require complete disassembly by someone with the resources and skills of a repair shop. As a temporary fix, you can simply wrap the hair band around the key to hold the key shut.
You won’t be able to use the trill key, unfortunately, but the benefit is that the rest of the flute will be playable now that the trill key isn’t stuck open.

Place the pad paper/cigarette paper in between the pad and the tone hole. Close the pad on the paper several times. This can help clean the pad and temporarily resolve stickiness. If this does help your sticky pad issue, the pad and tone hole surface may need to be cleaned by a professional. There are also pad cleaning products available at some flute retailers.
Do not drag the paper out from under the pad while holding the key closed. Over time, dragging the paper will prematurely wear out the pad skin, causing it to fray. Frayed pad skins can become even more sticky and noisy. It can also tear a fragile, older pad. Merely blotting is safe long term.


If tenons start to get tight, most often they simply need to be cleaned. Use your alcohol wipe to clean both parts of the tenon. For example, clean the barrel of the flute as well as the headjoint tenon.
Allow the parts a moment to dry before re-assembling. If the joints are still not assembling easily after cleaning, unfortunately, the correct fix may require the resources and skills of a professional. Do not force joints together that are not cooperating, as this can cause serious damage.
Are you feeling better prepared to handle some flute emergencies now? Good!
Clean, Oil, Adjust (COA) service
Now, I would like to make a proposal: What if you didn’t have to worry about flute emergencies at all? What if they were only a very faint possibility?
The way to achieve that blissful, low stress flute reality is to have your flute maintained on an annual basis by a good flute repairperson. The annual maintenance service for flutes is a Clean, Oil, Adjust (COA) service. The purpose of a COA service is not repair, but rather maintenance and preventative work.
A good technician won’t just address what is immediately wrong, but they will also take the time to thoroughly inspect all of the potential failure points of an instrument.
Not everything with flutes can be predictable, but with a detailed service, you can catch a lot of potential issues before they rear their heads and become a major problem. An example is adjustment/ regulation materials, which are typically paper, leather, or cork. In the process of disassembling and cleaning the keys, I have the opportunity to examine all of their components closely. The adjustment/regulation material is always glued to the key surface, and you often can’t see this material unless you have the mechanism completely apart.
If one of these adjustment materials looks oil contaminated, very old, or slightly off-kilter, it may loosen in the near future and fall off, rendering the instrument instantly and horribly out of adjustment.
Instead of taking a chance, I’ll replace that adjustment material and prevent that scary scenario from happening. If the others look similar, I’ll replace them as well. This is just one way in which a COA prevents future emergencies.
Now that I have explained that regular service helps prevent flute emergencies, I will also make an important acknowledgement: not everyone has access to good flute repair. There are a number of reasons for this, including lack of funds, having few technicians to choose from, not being in a country where it’s safe to ship instruments for repair, or being in a country where there are no flute repair technicians at all.
If you are someone who relates to any of the aforementioned scenarios, you are exactly the person that I had in mind when I set out to write this article. It is generally always best for a qualified professional to service a flute, but not everyone is in a situation where that is possible.
If you have access to a trusted professional, I do recommend avoiding DIY repair on any minor issues that are not causing the flute to be unplayable. The reason is that unqualified flute repairs carry a significant risk of damage to the instrument, and for something that is not affecting the playablility of the flute in a major way, it is not worth the risk, generally speaking.
However, if there’s a problem with the flute that renders it non-functional, and your first aid kit can turn an unplayable flute into a playable flute, this is exactly what all of your emergency preparation is for. It may not be ideal, but for those who have no other option, being able to do basic fixes on one’s flute can make all the difference.
If you would like to go more in depth, read as much as you can, and reach out to repair professionals for training, if possible. If you don’t have a repair person in your area, find someone whose work you admire, and ask if they will do a virtual session. In-person instruction is most ideal for this work, but nevertheless, much can be conveyed and accomplished in a virtual session if that is the only available option..
My desire to fix flutes grew from my passion for fixing my own cars. I am not a professionally trained mechanic, and I have no certifications of any kind for automotive work, but I’ve kept my cars on the road with my own two hands for my entire adult life. As you can see, I am all for DIY, which is why I felt strongly enough to write on this topic.
That being said, I am all for DIY with the safety of the instrument in mind. No one wants to damage their flute, and unfortunately, even with the greatest of care, it is all too easy to damage a flute while trying to fix it. Sometimes, when repair professionals caution people against working on their own instruments, it can come off as condescending.
I don’t want to make people feel that way. But in defense of those professionals, they are worried for a reason. Once you do this for a living, you can fully appreciate how wrong things can go. You know that things can get really scary, really fast if you don’t know what you’re doing (and sometimes, even if you do know what you are doing).
This is why repair techs can get a little jumpy about people doing their own repairs- we have seen the worst of unknowledgeable repairs, and it can be pretty horrifying to see the results of some of these attempts.
That being said, I often find that all that is needed are some guiding principles and good instructions in order to prevent harm.
Flutes are designed and built by human beings, for human beings to service. If you are human, you can learn this. If you are curious about working on your own flute, know that virtually every repair technician that I have spoken to started out just like you.
Start reading and soaking up every bit of information that you can, get a repair practice flute, remember what Verne Q. Powell told you, and give it a try!
My heartfelt thanks to Kimberley Jurens of Kimberley Jurens Woodwind Repair for first aid kit design, instructions, consultation, and additional editing.
Rachael Simon
Website | Facebook | Instagram
Rachael Simon is a highly trusted flute repair specialist based out of Eastern Pennsylvania. She is Straubinger Certified, Muramatsu Certified, and her shop is the official Burkart Repair Center East, serving the entire East Coast and New England. Rachael is known for her careful attention to detail, mechanical expertise, and relentless pursuit of perfection.
She has repaired and maintained flutes for top professionals around the world, including instruments for Haynes, Powell, Burkart, Miyazawa, and Yamaha artists. Rachael is also an accomplished flute repair instructor, and has had numerous students and apprentices go on to become top flute finishers and repair technicians. Rachael regularly presents on repair topics for flute events, repair shops, and private instructors.
Rachael holds a Bachelor of Flute Performance degree from Miami University, where she studied with Randolph Bowman, Principal Flute of the Cincinnati Symphony Orchestra, and Dr. Sandra Seefeld. During her studies, Rachael’s love for the flute manifested into a love for the flute as a beautiful machine, and decided to devote her efforts to learning flute repair. In 2011, Rachael went on to join Burkart-Phelan, Inc, where she worked for 6 years. In addition to working as a finisher and repair technician, Rachael studied advanced repair techniques with Lillian Burkart and Jim Phelan.
Her capabilities extend to precision machining, wood instrument crack repair, plating, and beyond. Rachael was also in charge of quality control operations for the highly-regarded Resona product line during her tenure. She additionally maintained a private repair shop that serviced all makes and models, earning acclaim from regional professionals and instructors. In 2016, Rachael continued her pursuit of fine flute repair by joining JL Smith and Co. as a flute and piccolo repair specialist. Her padding techniques and 9th mechanical ability earned her a reputation for bringing flutes to their highest performance potential in both sound and feel.
Rachael has operated her own independent flute repair specialty shop in Doylestown, PA since 2018. She brings her dedication to the craft, finely-honed precision, and deep love for the flute and piccolo to every job. Her passion is using her knowledge and skills to make each instrument a seamless joy to play for every flutist, whether professional, student, or amateur.

🔧 Explore Flute Repair & Craftsmanship
Pads are only one component of a flute’s performance and maintenance. Skilled repair technicians, flute makers, and headjoint specialists help ensure that an instrument performs at its highest level throughout its lifetime.
The Global Flute Directory is a growing international resource connecting flutists with repair technicians, makers, educators, organizations, and professional resources from around the world.


Great Article, Rachael!
How can I get a hold of Kim Jorgensen?